
1. Yay~ for 100 followers!
On Saturday I reached 100 followers!! Honestly when I first started blogging I thought 50 followers would be amazing already, so this is really a big deal for me! Since I started blogging in April, I experienced again and again the amazing warmth and generosity of the gyaru blogger community. Everyone I have met have been so eager to support and encourage one another. I am so thankful to those of you who have supported me since my first random posts when I didn't know what the heck I was doing. Some of these people I want to mention:
- Rinny (Rinny's Beauty Diary)
- Tiffo (Love ♥ Tiffo)
- Sweetkuromi (sweetkuromi's moment of beauty,fashion and life)
- Mimi (Sincerely Mimi)
And of course I must give a special mention to my friend Serra, without whose encouragement from the beginning, I probably wouldn't have continued blogging till now! By the way, she is my 100th follower!! Serra isn't a blogger herself (yet!), so though she didn't 'follow' my blog on Google connect, she has always been kind enough to read each and every one of my posts and give mer her feedback and suggestions. When she saw that I was at 99 followers, she immediately 'borrowed' her boyfriends google account to give me my 100th follower!
2. Easy Dolly Gyaru Makeup Tutorial
I've been thinking forever about making a video tutorial, but I still need to research the proper video capture/edit programs, and even buy a new HD video recorder >.<. So while I work on getting myself youtube enabled, here is my easy Dolly Gyaru makeup tutorial! I did this for Serra and Maria for Serra's Lolita themed party. Honestly I think it's so easy that anyone could easily achieve this look!
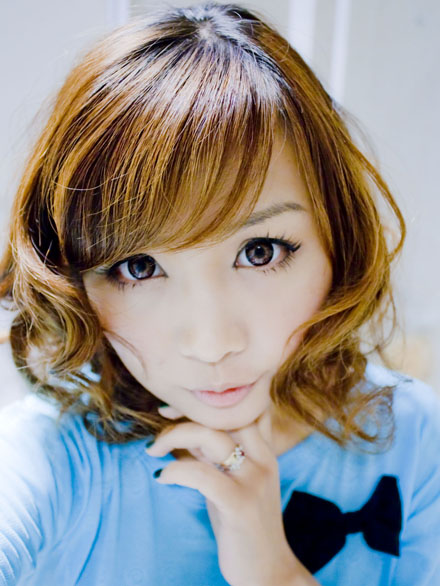
 The dolly look is all about the big half-moon shaped eyes, lush lashes, and relatively minimal makeup.
Step 1: Start with a flawless base. At the moment I use Missha BB Boomer, Clinique Minieral Powder Foundation and Clinique Concealer.
 Then, using pencil liner, subtly define the bottom line, like so:
 Step 4: False lashes! I use Dolly Wink No.2 Sweet Girly for top lashes. I love these lashes so much!

 After curling with an eyelash curler to bring your natural lashes in line with the false lashes, apply mascara.
 Apply mascara to just the middle bottom lashes.
 Like so:
 Then apply bottom lashes to just the outer edge. I'm using Dolly Wink No.8 Pure Little.
 Ta-da!

 Apply highlight liberally all over your eyelids, cross the top of your cheek bone, and on the bridge of your nose.
  Kansei~


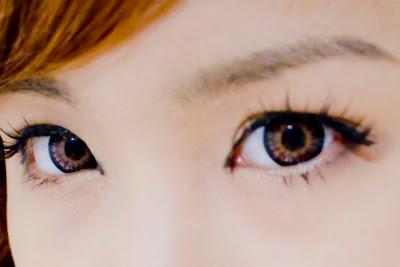
 And by the way, I'm wearing my new Princess Mimi Bambi Chocolate Brown lenses! These are definitely my new favourite lenses! How do you guys think these compare with the Sesame Grey?
Step 2: Eyeshadow. I use a simple 4 tone eyeshadow palette. This one is Clarins Gold Attraction You can see how well loved this palette is for me! I use a light brown (1), dark brown (2), and highlight (3).
 I apply 1 first, all over the outer edge of my eye to start off the Tare-me (droopy eye) half moon shape, then place the darker 2 on the inside. 3 then goes on the inside edge.

 Step 3: Eyeliner. I use Kiss Me Herine Make Smooth Liquid Eyeliner. If you remember I bought this from sasa.com last month. I absolutely love this eyeliner, it's super dark and very smooth and easy to draw.
 First draw a thin line (~2mm) close to the top lash line, then extend the line past the outer edge of the eye. Notice you can still see that annoying thin line of skin under the top lash line?
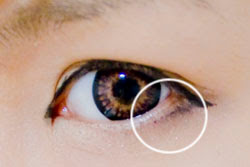
 Get rid of this by using a pencil liner (I'm using Kiss Me Heroine Make Pencil Liner) to draw *under* the top lash line.
 Then, with liquid liner, draw a small triangle on the inside edge of the eye. This step is important for my eye shape, but you might not need to :)
 I apply 1 first, all over the outer edge of my eye to start off the Tare-me (droopy eye) half moon shape, then place the darker 2 on the inside. 3 then goes on the inside edge.
Like so:
 Step 3: Eyeliner. I use Kiss Me Herine Make Smooth Liquid Eyeliner. If you remember I bought this from sasa.com last month. I absolutely love this eyeliner, it's super dark and very smooth and easy to draw.
 First draw a thin line (~2mm) close to the top lash line, then extend the line past the outer edge of the eye. Notice you can still see that annoying thin line of skin under the top lash line?
 Get rid of this by using a pencil liner (I'm using Kiss Me Heroine Make Pencil Liner) to draw *under* the top lash line.
 Then, with liquid liner, draw a small triangle on the inside edge of the eye. This step is important for my eye shape, but you might not need to :)
 Then, using pencil liner, subtly define the bottom line, like so:
Oops, almost forgot to line my eyebrows!
 Step 4: False lashes! I use Dolly Wink No.2 Sweet Girly for top lashes. I love these lashes so much!
 After curling with an eyelash curler to bring your natural lashes in line with the false lashes, apply mascara.
 Apply mascara to just the middle bottom lashes.
 Like so:
 Then apply bottom lashes to just the outer edge. I'm using Dolly Wink No.8 Pure Little.
 Ta-da!
Step 5: Highlights. I use Clarins Shimmer Highlights. A little bit of this goes a really long way, so I've had this one pot for years and years!
 Apply highlight liberally all over your eyelids, cross the top of your cheek bone, and on the bridge of your nose.
  Kansei~


 And by the way, I'm wearing my new Princess Mimi Bambi Chocolate Brown lenses! These are definitely my new favourite lenses! How do you guys think these compare with the Sesame Grey?
 I'd love to hear about techniques you guys are using for your makeup too~
No comments:
Post a Comment