,

Showing posts with label nails. Show all posts

Monday, November 12, 2012

Fantastic Nails

Pin It Now! Etude House LUCIDarline Fantastic Nails (another extremely long name from Etude House!) look like they belong in a jewellery box. The collection features super pretty metallic and glitter infused jewel tones enclosed in adorable heart shaped vials. For a self confessed human magpie, I just had to have them.
I love just about all the colours in the collection, but Spangle 05 Dazzling Pink and Glittering 07 Tangerine Orange are definitely my favourites. I picked these up from an Etude House boutique during my short trip to Singapore last month.
Etude_house_lucidarling_fantastic_nails_spangle_05_glittering_07
I really love LUCIDarling Fantastic Nails’ flat brush. Flat brushes are the easiest to use in my opinion. LUCIDarling Fantastic Nails’ brushes are thinner than the OPI ‘pro’ brushes, but fan out easily with a bit of pressure.
Etude_house_lucidarling_fantastic_nails_brush


Tuesday, July 10, 2012

3 Concept Eyes Nail Lacquer, hit or miss?

Pin It Now!

After several horrible experiences with poor quality nail polish, I’ve become a total snob when it comes to brands of nail polishes I’ll buy! But 3 Concept Eyes’ (3CE) quirky-chic, indie-look image totally meshes with my aesthetic and I pretty much didn’t care how good or bad the actual product was, I just wanted to own a few vials! At $8 each, I would say 3CE nail lacquers are definitely within the affordability zone.

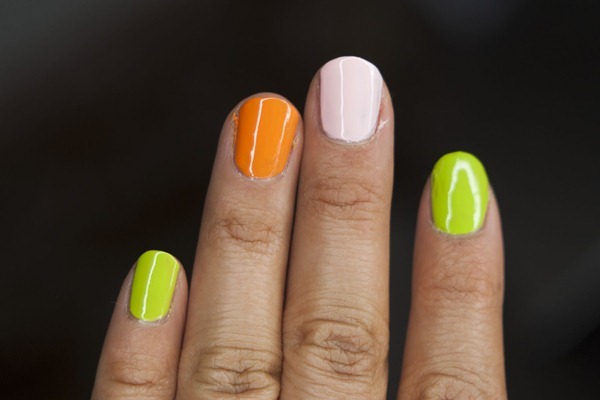
3CE has a range of super on trend nail colours. I was looking to expand my colour palette to pastels (of course), so I picked up pastels PK15, GN12 and OR3 from the vivid collection.

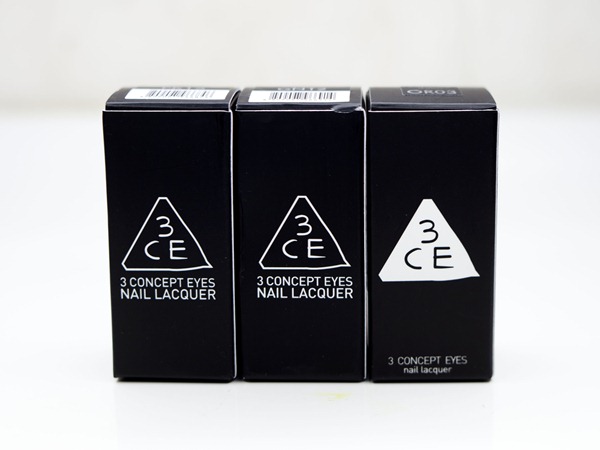
I love the hand drawn label and somewhat pop art feel of 3CE’s product packaging.

143

Even the outer box is totally collectible!
144

I wouldn’t say these nail lacquers are salon quality, and is not where near as easy to apply and quick drying as my favourites OPI, China Glaze or Essie, but they are very good for the price. Infinitely better, for example, than super cheap brands like Ultra3.

The first coat applies slightly unevenly, both in surface texture and product distribution. The formula of pastel colours from any brand are generally gloopy, making them harder to apply neatly without getting it on your skin. This is also the case with 3CE pastels. The green had the best consistency of the three.

163

But don’t let the first coat fool you! After the second coat, the nail lacquer completely smoothed out and became super opaque! The finish is as high quality looking as any salon quality brand. However, using a fast dry top coat such as Sech Vite is a must, as after two coats 3CE nail lacquers take a very long time to completely dry. In fact, it’s probably the type that never completely dry on their own. With Sech Vite, they harden in under 5 minutes! Actually I think for some reason 3CE nail lacquers mix better with Sech Vite than any brand I’ve tried so far.
164

The quality of these nail lacquers clearly reflects the price, but the colours are undeniably gorgeous! I’d say definitely swaying towards ‘hit’.

160

Slightly veering off topic, in the same order I also picked up 2CE’s angled contouring brush.

141

The bristles are not as soft or full as you’d probably want, but in this way it’s definitely comparable to any quality drug store brand like Model Co. or Manicare, but a fraction cheaper, at $14.99AUD.

142

The application is natural and even. Definitely happy with this product!

125

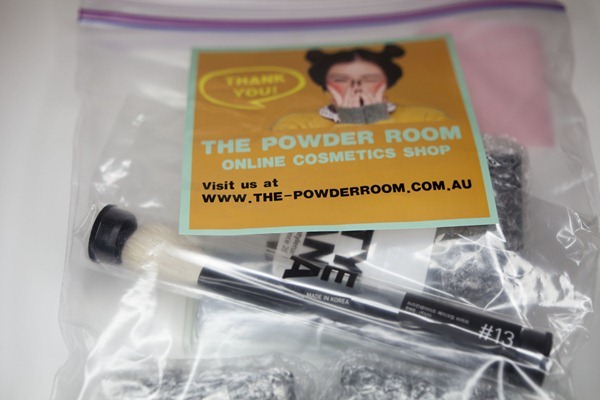
I’d never even heard of 3 Concept Eyes until Australia based online store http://www.the-powderroom.com.au turned up out of nowhere a couple of months ago. I thought I might share their cute shipping package, complete with hand written post-it!
137138

The also threw in a free pair of false lashes.

165


I’m already planning my next purchase, and I’m thinking it will definitely include one of these awesome looking lip pigments!

Monday, January 2, 2012

Monday nail stuff: Cheat like me with nail stamping plates

Pin It Now!

For some what of a noob in nail art, metal nail stamping plates sounded to me like the calculus cheat sheet of the nail world: what? create any manner of intricate designs with the nail polishes you already own with no previous nail technician related training required? I was instantly sold. (In reality of course, it turned out the technique needed a little perfecting before I could show you guys the result!)

This little kit of stamper, scraping knife and plates x 2 was sent to me by http://www.bornprettystore.com/.

3132

The basic idea is, apply nail polish over the embossed design;

34

Scrape excess nail polish off with scraper;

35

Imprint design onto stamp, and press on to nails!

36

Tada!

20

For this look I used two coats of OPI “Lincoln Park After Dark” as the base base colour, let dry, then used OPI “Pamplona Purple”, a cream colour, for the tip detail!

Some tips I learned about using this tool that may help:

  • Works best with opaque or saturated colours such as any near blacks, reds or pastels.
  • The design will show up best if the colours used contrast well e.g. black x white, blue x yellow
  • Imprint the stamp and apply to nails fast before the nail polish dries on the plate or stamper (this tripped me up every time!)
  • Do this over a magazine as it gets messy
  • Before use, it’s a good idea to clean the stamper with acetone (nail polish remover), as this is really effective in removing lint and dust.

Kits like mine are available from http://www.bornprettystore.com/! They have countless other plate designs and also a huge range of nail art tools and accessories, jewellery, makeup, and now circle lenses – check them out next time you’re looking to stock up on  your nail art supplies on the cheap!

Comment with Facebook!